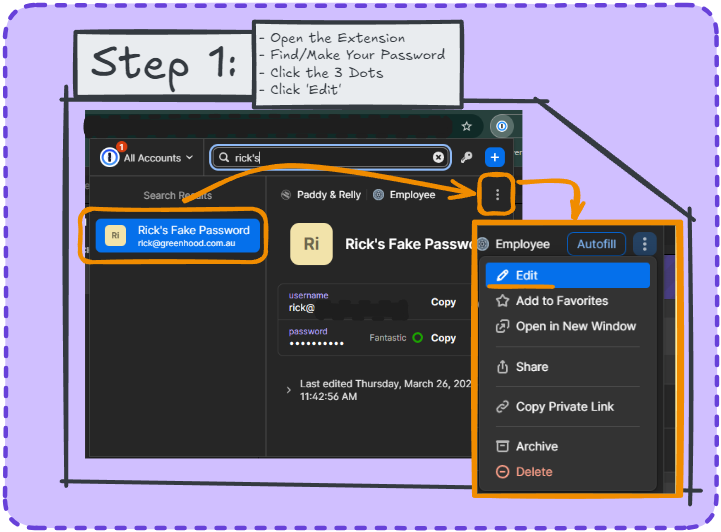
Step 1:
Open up your 1Password extension and find the entry you want to add the 2FA code to, or create a new one if needed. Once looking at the saved credential hit the 3 dots to the right and hit ‘Edit’ in the resulting menu.
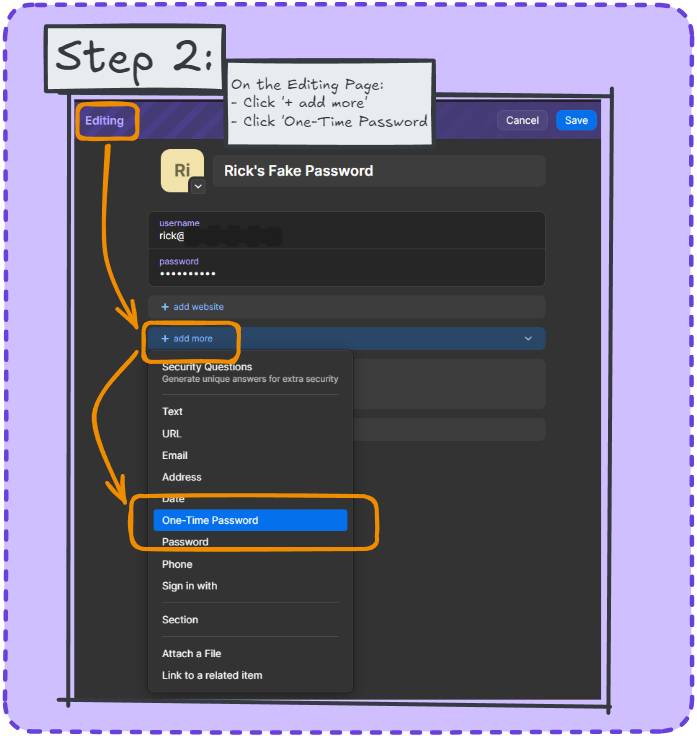
Step 2:
This will bring up the editing page for the credential. You’ll see a section with an option to ‘Add More’ click on that and select ‘One-Time Password’ from the resulting menu.
Step 3
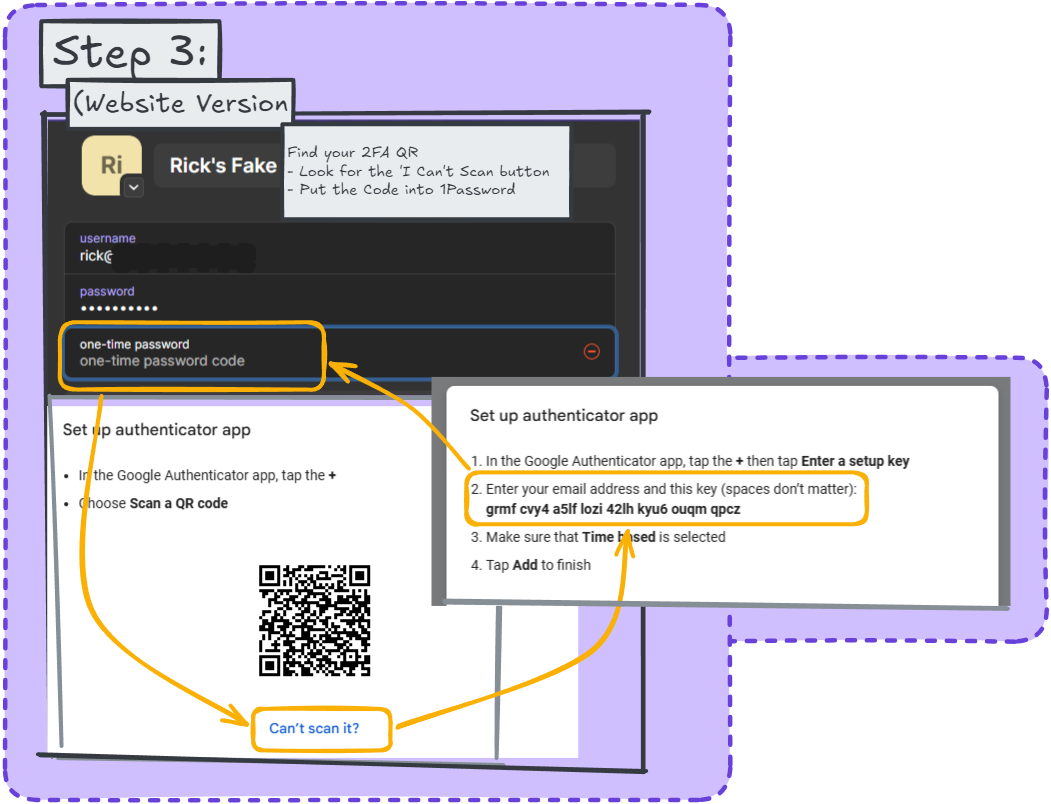
At this point you need to be looking at the setup QR code for whichever service you’re trying to configure. This step will differ based on whether you have just the 1Password extension installed or if you also have the standalone app.
For the Extension:
The extension doesn’t have the ability to ‘see’ images so the QR won’t work. Luckily most if not all services have an option to get another this. The example below is from the Google account setting authenticator setup, you’ll see the ‘Can’t Scan It?’ button, they won’t always use the same words but there should be a similar option on all of them.
Click that link and it will offer you either a URL and a ‘key’ (Jumble of letters and numbers) Google only have a key because you use your Google email as the URL.
For 1Password you just need the key, copy and paste it into field in the editing windows that says ‘One Time Password Code’
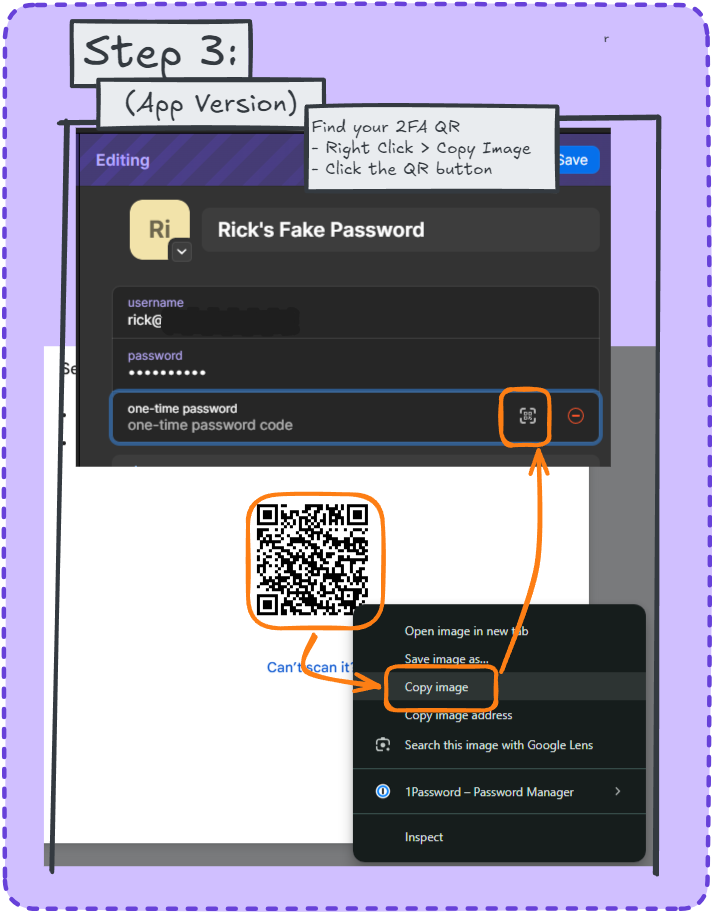
For the 1Password App:
If you have the standalone 1Password add it’s a bit simpler, simply right click the QR code and then click on the QR button that is at the far right of the ‘One-Time Password Code’ Field, the app will read the QR from your clipboard and set up the code.
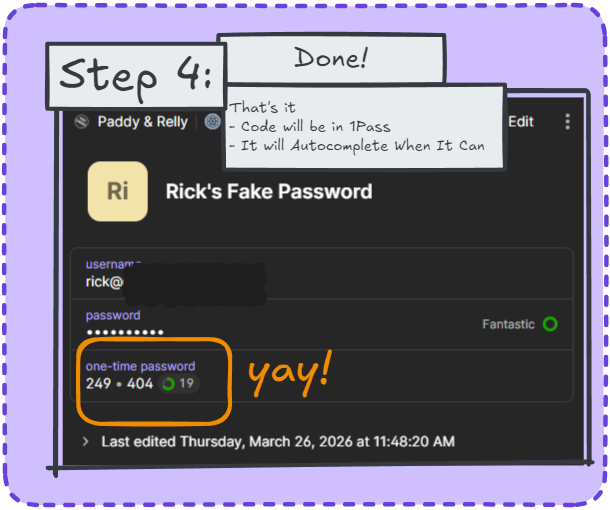
Step 4
Done! The 2FA is now saved under that credential in 1Password, you’ll see it scrolling every 30 seconds. From here whenever you need the code it’ll autocomplete if it knows the website, otherwise you can just search in the extension (Control/cmd + Shift X is the shortcut btw) and hit copy to put it in the clipboard and paste it wherever you need!